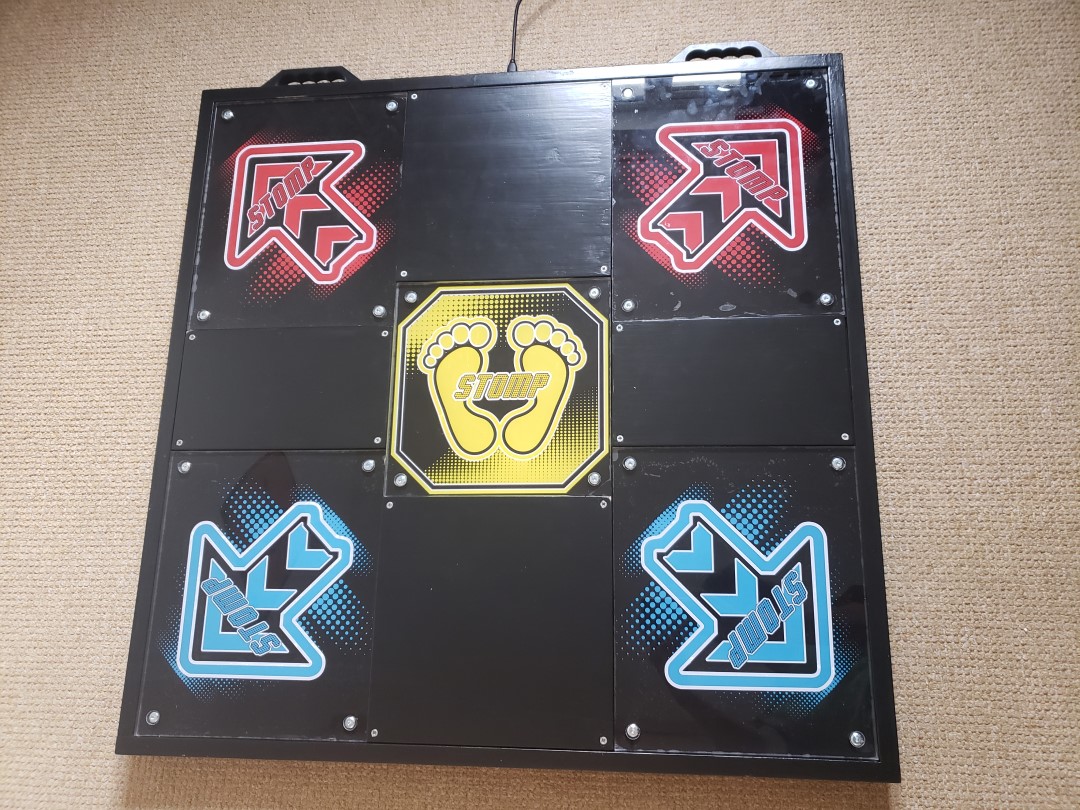
DIY dance pad for the game Pump it Up. Built using wood, full acrylic panels, 3D printed parts and LED lighting controlled via Arduino.
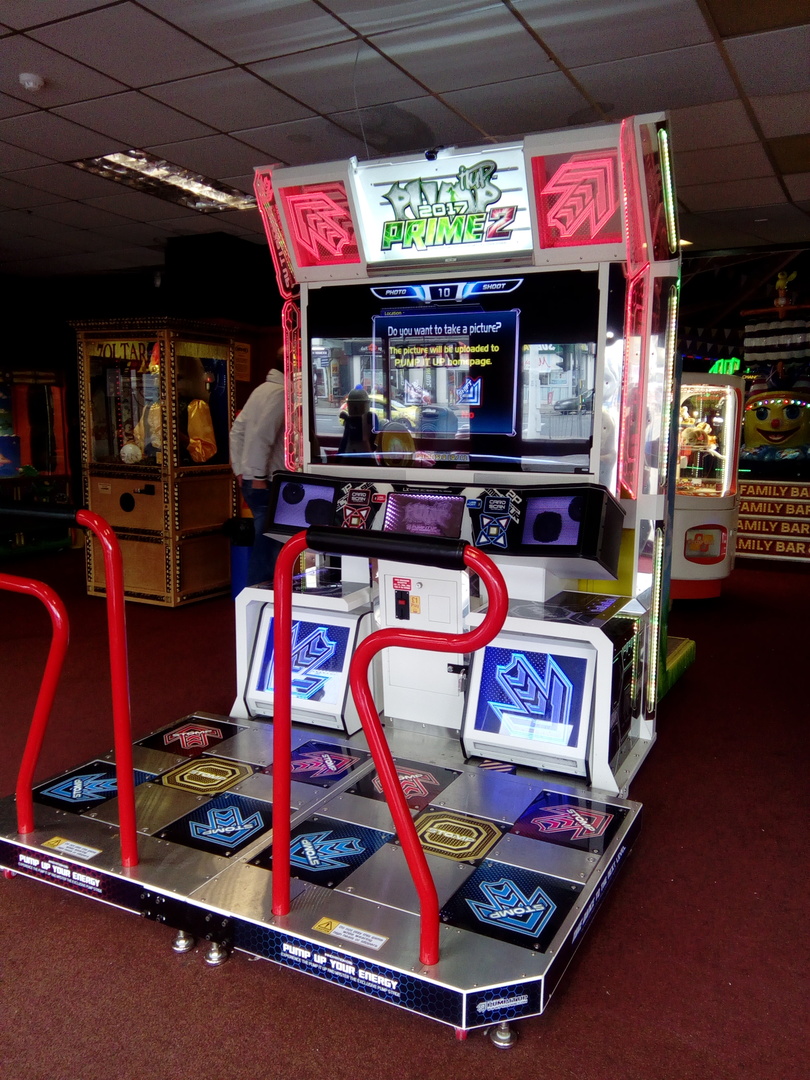
Pump it Up is a dance arcade game, similar to DDR, but better ;). Back in my late teenage years I used to play it all the time in a nearby shopping mall arcade, sometimes multiple days a week. Building one of these pads for myself was always something I wanted, but I never quite had the expertise, time or money to pull it off. Of course I could buy or build a “soft” foam pad, but I wanted the authentic arcade feel of a hard pad.
A decade or so later I still had fond memories of the game and now I had more access to tools and had learnt a thing or two about DIY, so I decided to take the plunge and give it a go at building this. I also have a 3D printer now, which I knew I could use to print custom parts for it, which was exactly what I did since I had much more experience with this than with woodworking. This is what it looks like after months of work, and over a hundred of man-hours of designing, prototyping, building, and most importantly, play testing the pad:
This post is just a high level overview of what the pad is and how it works. You can find more detailed information about each of the pad’s components and how they were designed and built here:
- Part 1 - Frame Build and BOM
- Part 2 - Arrow Panels
- Part 3 - Pad Sensors
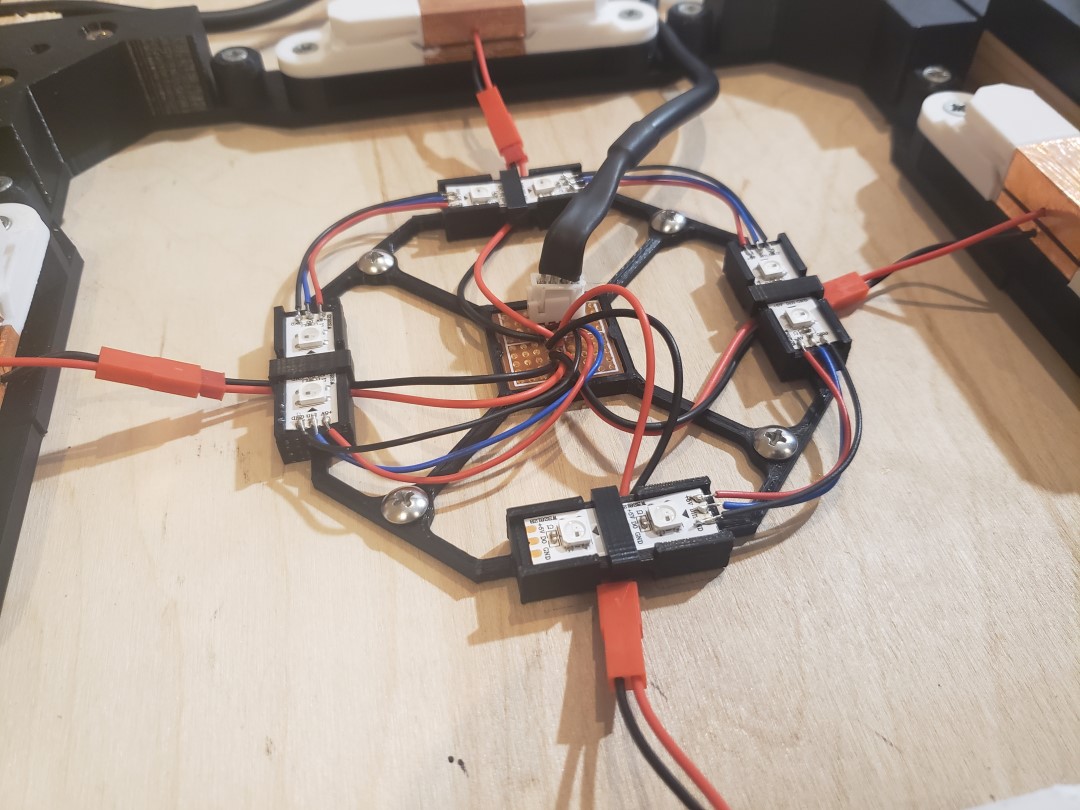
- Part 4 - LEDs and Electronics
- Part 5 - Arduino Programming
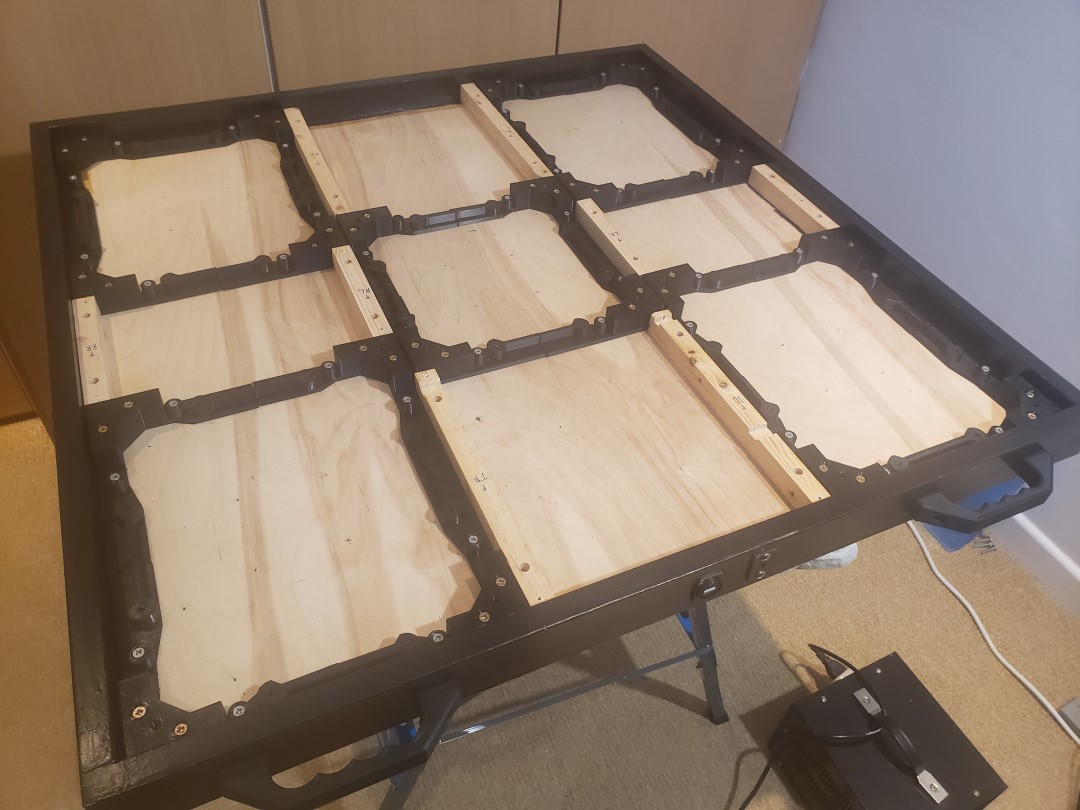
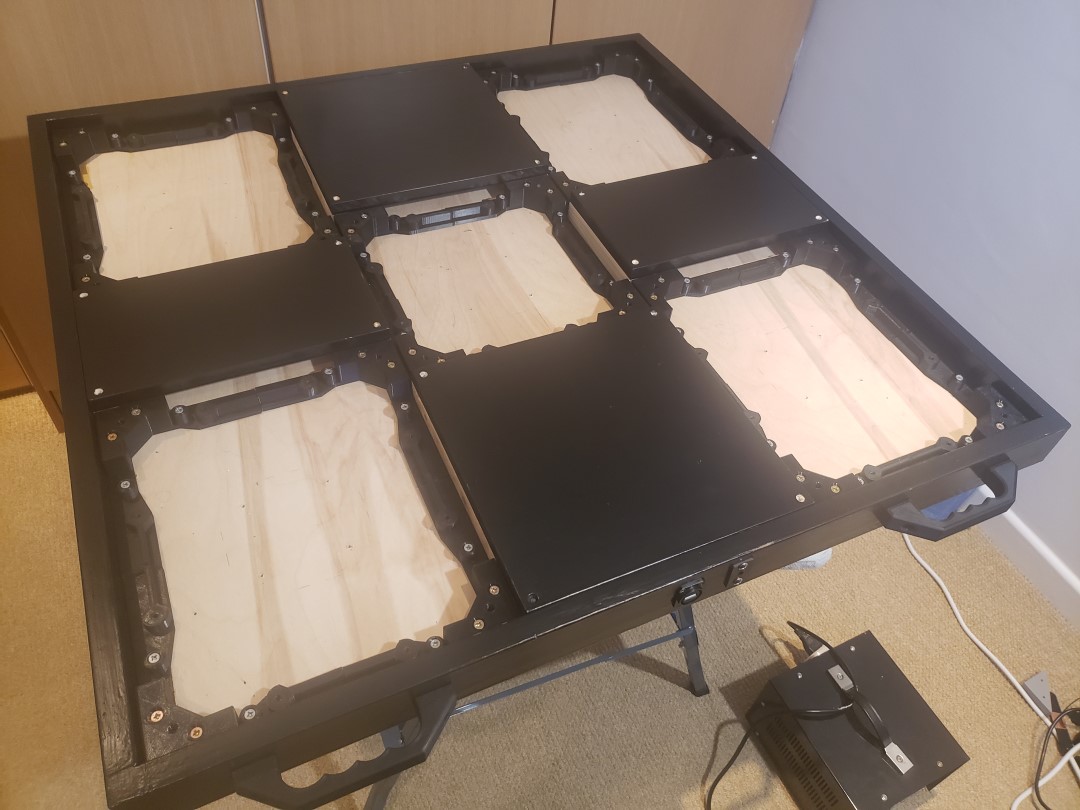
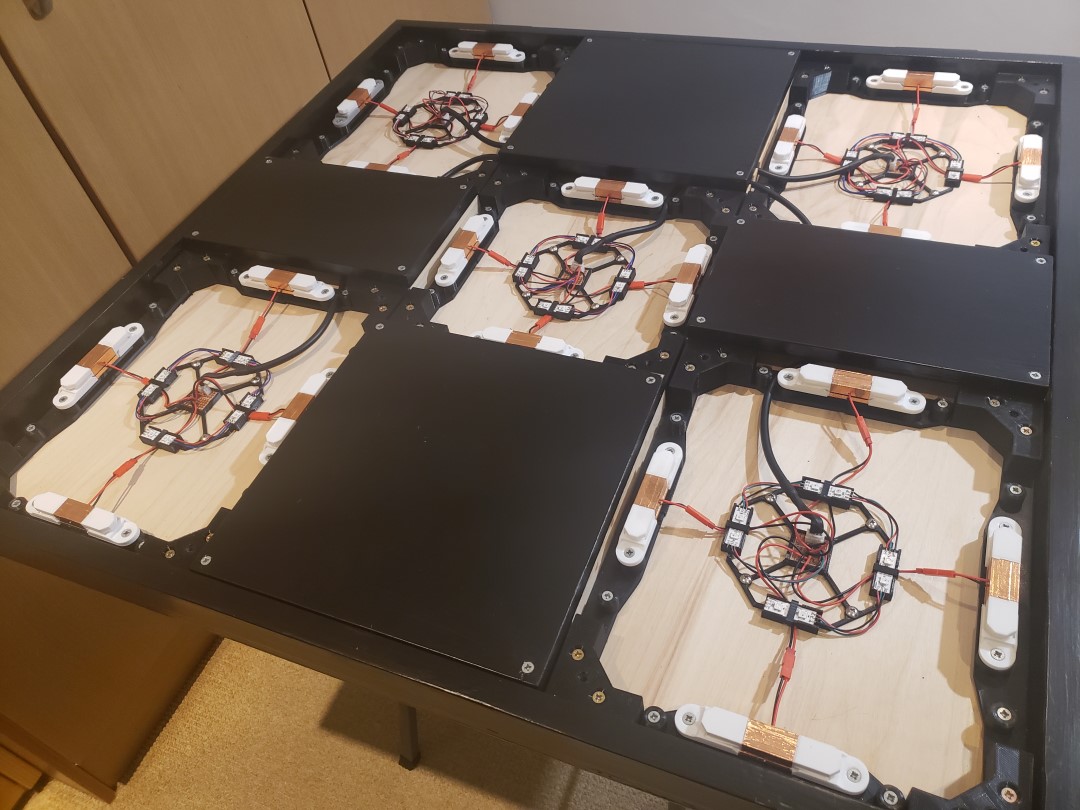
Frame
The pad frame is built mainly out of wood, and has (should have) the same dimensions as the official pad. The only size difference is at the front and back, where the official pads have an extended area in the front for the electronics, and an extended area at the back for the metal bar. That bar is meant for the player to hold on so they can keep their balance on harder songs and it’s something I intend to integrate to my pad in the future. The final external dimensions of the pad are 877x877x57mm, plus some 40mm at the front for the handles, and it weights 20.2kg.
Along with wood, each arrow panel is supported by a 3D printed frame. 3D printing was chosen mainly because I’m a developer/tech person, and I can create a more complex 3D designs much more easily than I can make complex wood cuts and joins :). And yes, even with fully grown adults jumping up and down on those plastic parts, they seem to be holding up very well, with no visible wear. Lastly, I added some handles so it’s easy to pick it up and store it, as I live in a compact apartment and optimising space is a must.
Panels
Each individual arrow panel (also called a pad) is made of 10mm clear polycarbonate acrylic sheets, and the art on them was printed in semi-gloss A3 paper, and glued together with regular white glue. It’s far from ideal, and it clearly shows, but it’s easy to scrape it off in the future if I need to upgrate to something more proper. 10mm may seem quite thin to support the weight of adults stomping the panels, but it’s really strong and apt for the job.

Step sensors
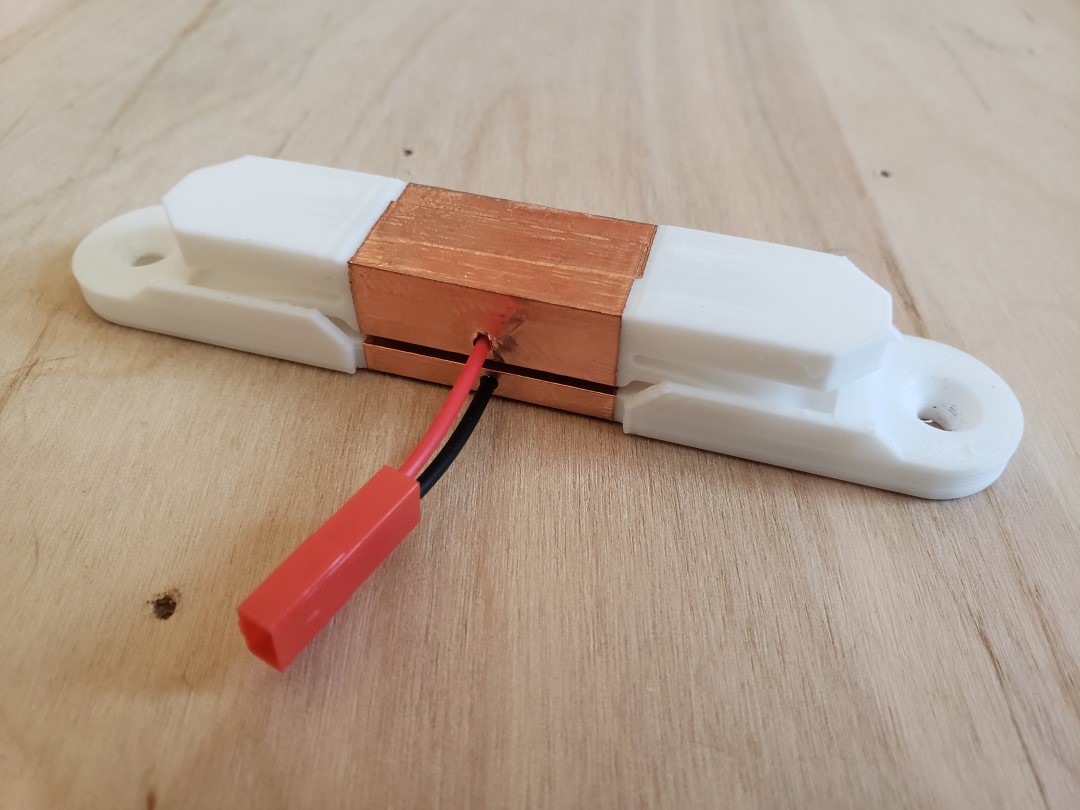
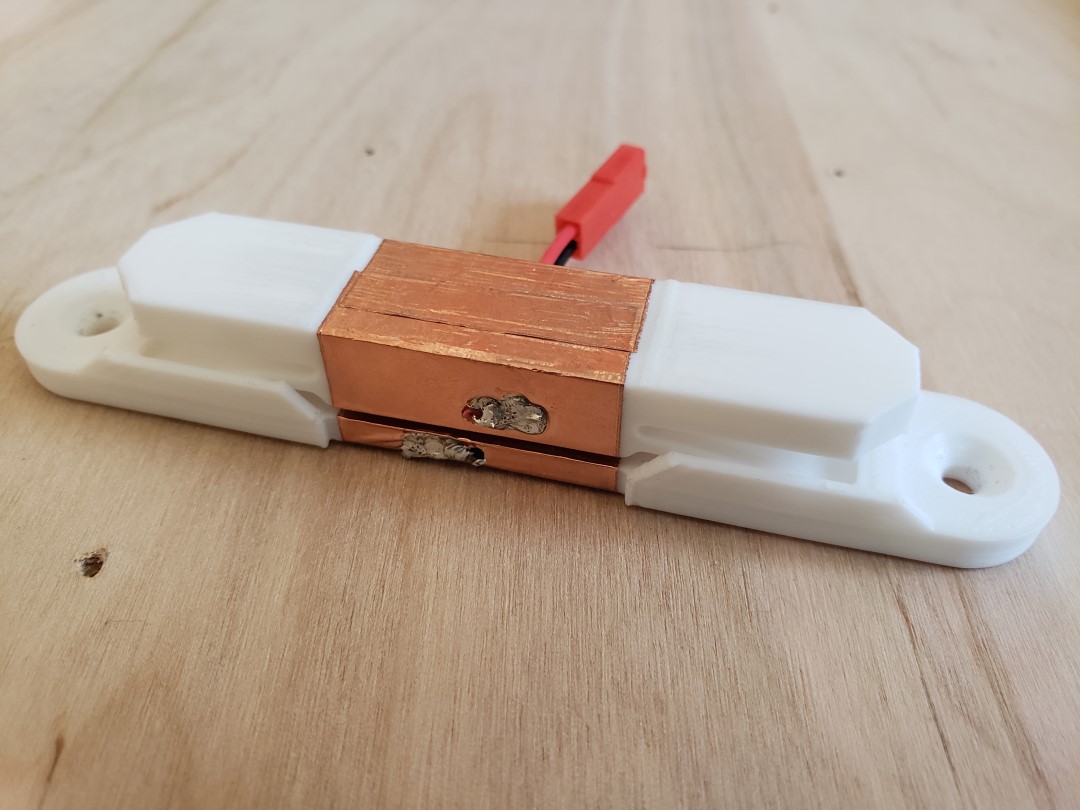
Everyone that has tried to build one of these knows that the trickiest parts of the build are probably the sensors. The sensors detect when the player is stepping on the panel, and send this input to the game. There are many ways to build effective sensors. Arguably the simplest option is to mount a conductive plate on the panel and another on the frame, and put a springy material in between, allowing them to keep apart normally but get in contact with each other when pressure is applied. This approach is electrically equivalent to a momentary push button, and is very easy to use in conjunction with an Arduino. I decided to create a sensor out of 3D printed parts, so I iterated over many designs and reached this final form of the sensor, which works beautifully and so far hasn’t given me any issues, and me and my wife have been playing PIU at home for months now. Each panel uses 4 sensors, one on each side, making it easy to trigger it by stepping anywhere on the panel, center or not.
Electronics
Underneath each arrow there are 8 LEDs that light it up whenever a player steps on them. The entire pad, including the LEDs, is controlled by an Arduino Leonardo. The Leonardo was chosen because it can act natively as a USB keyboard/mouse/game controller. When the pad is connected to a PC, it shows up as a generic HID game controller with 5 buttons, making it very easy to setup key mappings on games such as Stepmania or StepF2 (which is what I use). One of the main limitations of this pad is that it can’t be used with the official game distribution (the official HDD), as that needs a very specific hardware setup, and proprietary IO boards.
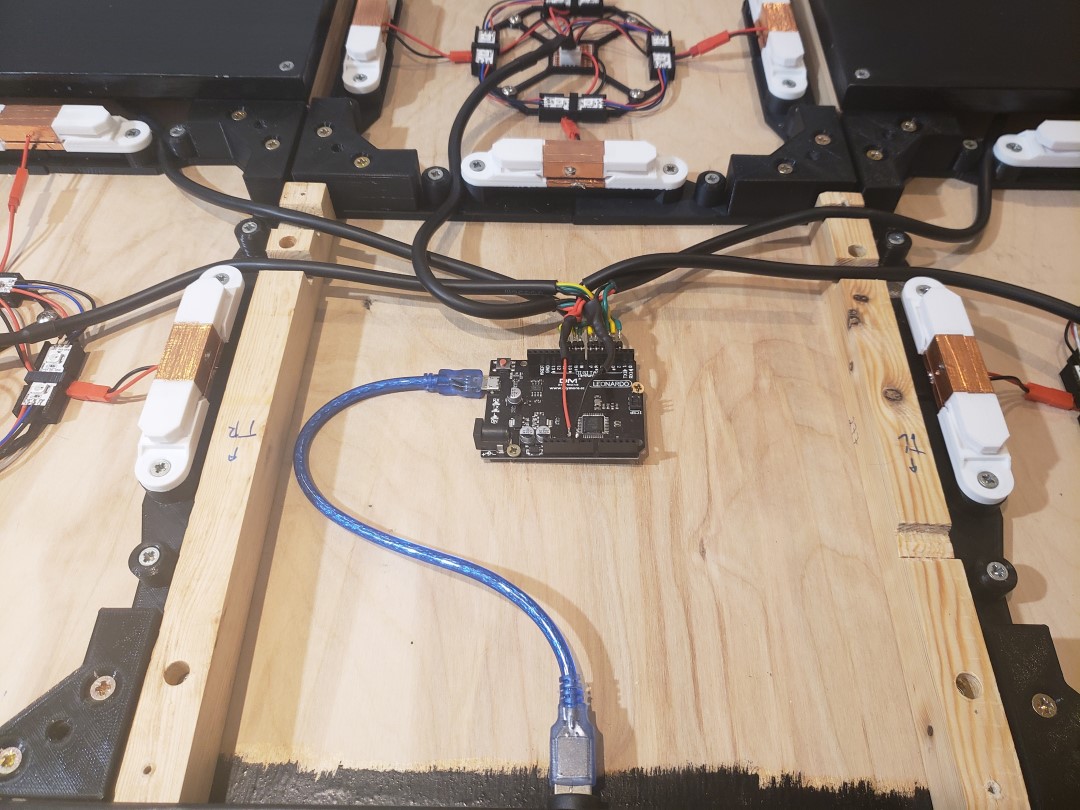
The main advantage of controlling the LEDs with Arduino is that they can be programmed to “dance” own their own, following the rhythym of a song. One of the software upgrades I plan on doing is to provide the pad with a step chart (the file that tells the game which arrows must be played), and have it play out the song with the LEDs, as a sort of “demo mode” while the pad is not in active use, or maybe just simply simulating random steps on it so it appears more dynamic.
Conclusion
It took me around 7 months, working on and off to finish this pad. I have only a slight idea of how much it cost me to build it, as a lot of stuff I had to redo or buy parts for it again because the first iterations were crap. Designing it from scratch is definitely not for everyone, it took a lot of patience and ingenuity to solve some of the issues I had, but overall it was a very rewarding process, and I’ve learnt a lot doing this.
I already have plans to build a second pad so I can play doubles, which should be much easier as I already have some material, and all of the tools and designs I used for the first one. Before that, though, I intend to integrate some bars in the pad so I can play songs higher than around S13, which are kind of hard without a bar, as one tends to lose either balance or stamina too quickly.